

Schedule a professional builder warranty inspection at roughly 11 months after closing. That single step is how you document workmanship and materials defects before your one-year coverage ends and the builder’s obligation to fix them disappears. According to InspectandTest, inspectors commonly turn up 30–80 punch-list items on new construction, most of them fully covered under year-one workmanship provisions. Start booking in month 10. Builders typically need some time to schedule and complete repairs, and you want that window inside the warranty period, not after it.
The highest-value areas to flag before your one-year deadline:
- Drywall cracks and nail pops
- Trim gaps and paint touch-up failures
- Sticking or misaligned doors and windows
- Flooring gaps, squeaks, or lifting edges
- Failed caulking at tubs, counters, and exterior penetrations
- Grading and drainage issues near the foundation
Schedule your 11-month inspection before month 10 ends.
Table of Contents
- Why month 11 is the right time to book your warranty inspection
- How to read your warranty and prepare before the inspector arrives
- The 11-month warranty checklist: what your inspector should cover
- What happens on inspection day and what you should receive
- How to file warranty claims and follow up until repairs are done
- How to choose the right inspector for a warranty inspection
- What we see in Chicago-area homes at the 11-month mark
- Book your 11-month inspection with Chicago Home Inspect LLC
- Sources
Why month 11 is the right time to book your warranty inspection
The math here is straightforward, but most new homeowners miss it. Your builder’s warranty is not one coverage period — it’s layered. The FTC confirms that most new-home warranties split into roughly one year for workmanship and materials, two years for major systems like HVAC, plumbing, and electrical, and up to a decade or more for major structural defects.
| Coverage Tier | Typical Duration | Recommended Inspection Timing |
|---|---|---|
| Workmanship & materials | 1 year | Month 11 |
| Major systems (HVAC, plumbing, electrical) | 2 years | Month 23 |
| Structural defects | several years long | Month 60 or later |
Month 11 is the right target for year-one coverage because it gives you a 30–60 day buffer. That window matters. After you submit a claim, the builder schedules their own inspection, then schedules the repair crew, then you may need a re-inspection to confirm the fix. An inspection at week 51 leaves room for all of that. An inspection at week 51.5 often does not.
NerdWallet recommends scheduling ahead of each coverage deadline, not just the first one. Set three calendar reminders now: month 11, month 23, and month 60 (or whatever your structural coverage term specifies). Each one protects a different tier.
A note on earlier inspections: Some advisors suggest inspecting at 6–9 months if you anticipate major repairs that need extra time. The tradeoff is that you may miss settling-related issues and seasonal defects that only show up after a full Chicago winter. Month 11 typically catches both.
How to read your warranty and prepare before the inspector arrives
Read your warranty document before you call an inspector. Many warranties require written notice of defects during the coverage period and specify exactly how claims must be submitted. Missing that procedural step can void a legitimate claim even when the defect is clearly covered.
Pull these specific clauses and write them down:
- Effective date: Confirm whether coverage starts at closing or at certificate of occupancy — they are sometimes different.
- Workmanship definition: What the builder considers a covered defect versus normal settling or owner-caused damage.
- Owner maintenance obligations: Items you are required to maintain (caulking, HVAC filters, grading) that can shift liability to you if neglected.
- Claim submission process: Portal login, certified mail address, or both — and any required forms.
- Builder response timeline: How many days the builder has to inspect and respond after you submit.
Before the inspector arrives, gather your supporting documents: closing paperwork, the move-in punch list you signed, appliance manuals and serial numbers, and any photos you took at move-in. That package becomes your claim packet. The FTC advises keeping organized records of pre-move-in and move-in conditions specifically because warranty disputes often come down to what was documented and when.
Pro Tip: Send every warranty submission in writing, either through the builder’s portal with a confirmation screenshot or via certified mail with return receipt. Keep copies of the inspection report, the submission, and the delivery receipt in a dedicated folder. Verbal conversations with builder reps carry almost no weight in a dispute.
The 11-month warranty checklist: what your inspector should cover
This checklist focuses on year-one workmanship and materials issues. These are the items most likely to be covered and most likely to be missed without a professional set of eyes. Full Circle Home Inspectors and other industry guides consistently organize these into the same categories, and for good reason — they reflect where new construction most often falls short.
Exterior and structure
- Siding gaps, stucco cracking, or missing caulk at penetrations
- Trim separation and paint failure at exposed wood
- Grading that slopes toward the foundation instead of away from it
- Sidewalk and driveway cracking or settlement
- Garage slab cracking and moisture intrusion at the perimeter
Roof and attic
- Missing or lifted shingles, improper flashing at valleys and penetrations
- Attic ventilation gaps or blocked soffit vents
- Insulation coverage gaps, especially at eaves
- Water staining on sheathing or rafters
Mechanical systems
- HVAC: uneven heating or cooling across zones, thermostat calibration, filter access
- Plumbing: slow drains, dripping supply connections, water heater installation
- Electrical: improper wire connections, missing knockouts, GFCI and AFCI protection at required locations
Interior finishes
- Drywall cracks at corners, door frames, and ceiling transitions
- Paint holidays and texture mismatches
- Trim gaps at base, crown, and casing
- Sticking or binding doors and windows, hardware that does not latch cleanly
- Cabinet alignment, drawer operation, and countertop seams
Kitchens and bathrooms
- Faucet drips and supply line connections
- Tile grout cracking or missing grout at tub and shower surrounds
- Appliance installation issues (document serial numbers for warranty registration)
- Bath exhaust fan operation and duct termination
Garage, basement, and foundation
- Slab cracking beyond hairline width
- Sump pump operation and discharge routing
- Moisture staining on basement walls or floor
- Backfill settlement at foundation perimeter
Safety items
- Smoke and CO detector placement and operation
- GFCI protection at kitchens, baths, garage, and exterior outlets
- Handrail stability on stairs
Pro Tip: Expect a 30–80 item punch list on new construction — that is normal and not a sign of a bad build. Focus your follow-up energy on items the builder must address under year-one workmanship coverage, not cosmetic preferences.
What happens on inspection day and what you should receive
You should receive a photo-rich, itemized report within 24–72 hours of the inspection. That turnaround matters because you need time to review it, confirm covered items, and submit your claim before the warranty window closes.
On site, the inspector will:
- Walk the full exterior, checking siding, grading, roof edges, and drainage
- Access the attic and, where safe, the roof surface
- Run all plumbing fixtures and check for leaks at supply and drain connections
- Operate the HVAC system and check accessible components
- Test all GFCI and AFCI outlets, smoke detectors, and CO alarms
- Walk every room checking drywall, trim, doors, windows, and flooring
- Document moisture readings at areas of concern
The report you receive should include clear location labels (“master bath, east wall, lower left corner”), date- and time-stamped photos, a severity or priority classification for each item, and a recommended action. The BrickKicker notes that well-formatted reports give homeowners stronger leverage when negotiating repairs because the documentation removes ambiguity about what was found and when.
A good report is organized into a summary section, system-by-system findings, and a photo appendix. That structure maps directly onto most builder warranty claim portals. See sample interior inspection photos to understand the level of documentation a professional report should include.
How to file warranty claims and follow up until repairs are done
Submit the inspector’s report in writing through your warranty’s required channel the same week you receive it. Delay costs you repair time inside the coverage window.
Step-by-step claim workflow:
- Confirm covered items. Cross-reference each punch-list item against your warranty’s workmanship and materials definitions. Flag items that clearly fall under year-one coverage.
- Assemble your claim packet. Combine the inspection report, labeled photos, your move-in photos, appliance documentation, and any prior written communications with the builder.
- Submit per warranty instructions. Use the builder’s portal or certified mail. Screenshot or photograph your submission confirmation.
- Request a written repair timeline. Ask the builder in writing when they will inspect the defects and when repairs will be scheduled.
- Document all communications. Date, method, and summary for every call, email, or portal message.
Your claim packet should include: the property address and lot number, your closing date, a summary of defects referencing the attached report, and a requested repair timeframe. LegalClarity confirms that written documentation and proof of delivery are the foundation of any enforceable warranty claim.
If the builder does not respond within their stated timeline, send a follow-up in writing referencing the original submission date and requesting a specific response by a named date. Keep that letter. If repairs are completed, schedule a re-inspection to confirm the work was done correctly before you sign off.
For persistent non-response, options include contacting the warranty administrator (if the warranty is backed by a third-party insurer), filing a complaint with your state’s consumer protection office, or consulting an attorney about small-claims options. This article is general information, not legal advice — confirm current procedures with a qualified professional.
How to choose the right inspector for a warranty inspection
Choose an inspector who understands new-construction punch lists and formats reports for builder warranty submission. General home inspection experience is not the same thing. A warranty-oriented inspection requires familiarity with builder-specific defect categories, coverage tiers, and the documentation format builders actually respond to.
Key credentials and questions to ask before you book:
- Do you prepare builder-ready punch lists? The report format matters as much as the findings.
- What certifications do you hold? InterNACHI certification and a state license are the baseline. Both signal training standards and accountability.
- Are you licensed and insured? Non-negotiable. Errors and omissions coverage protects you if something is missed.
- What is your report turnaround? You need the report within 24–72 hours to have time to act.
- Do you provide labeled photos and severity ratings? Unlabeled photos are nearly useless for a warranty claim.
- Can I see a sample report? Any inspector confident in their work will share one.
Mortgageresearch that the inspection cost is modest relative to the potential repair savings when defects are caught under warranty rather than paid out of pocket. Typical 11-month inspections in the Chicago market cost a modest amount of money, with add-ons like radon testing, mold testing, or a sewer line inspection priced separately.
Red flags: vague narrative reports with no photos, an inspector unfamiliar with warranty timelines, or pressure to add unnecessary testing services before you have seen a sample report.
What we see in Chicago-area homes at the 11-month mark
In Chicago-area new construction, the defects we most commonly find at the 11-month mark fall into two categories: finish issues that were present at move-in but not documented, and moisture or settlement issues that only became visible after the first full winter.
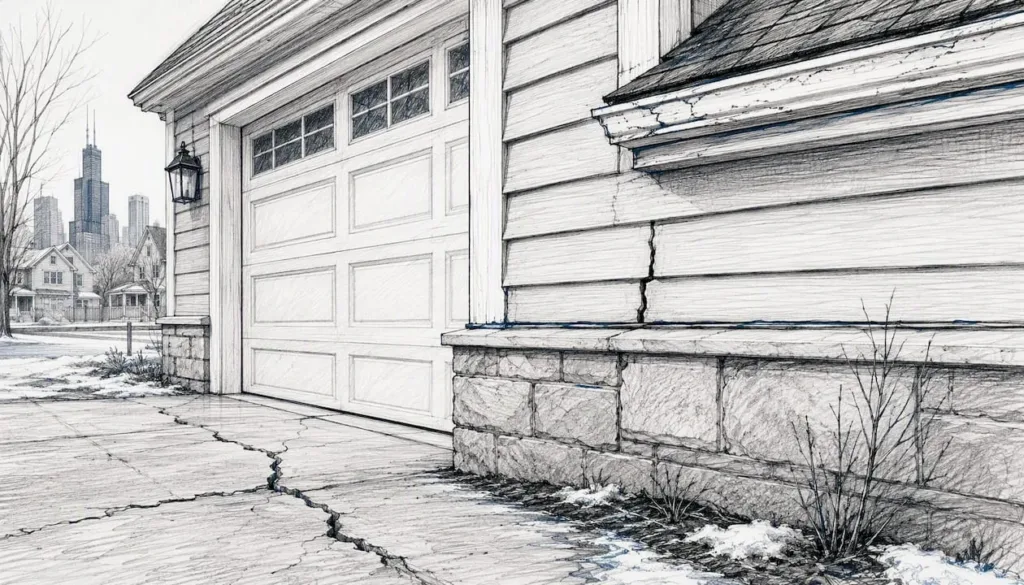
Chicago’s freeze-thaw cycles are hard on new construction. Climate Zone 5 conditions mean exterior caulking, flashing, and grading that looked fine in October can show significant movement by March. We regularly find flashing gaps at roof penetrations on bungalow-style builds on the Northwest Side, drainage and backfill settlement issues on two-flat conversions in Logan Square, and garage slab cracking and grading problems on newer suburban builds in DuPage and Lake Counties. These are not rare edge cases. They appear consistently because new construction settles through its first winter, and that settlement is exactly what year-one workmanship coverage is designed to address.
We are licensed and insured, InterNACHI certified, and BBB accredited. We serve Lake, McHenry, DuPage, and northern Cook Counties. Our reports are formatted as builder-ready punch lists with labeled, date-stamped photos and priority classifications. We also see common issues Chicago inspectors find repeat across neighborhoods and build types, which means we know where to look and what to document.
Book your 11-month inspection with Chicago Home Inspect LLC
Our 11-month inspection is built for one purpose: producing a builder-ready punch list and photo report you can submit to your warranty administrator the same week. We cover the full scope — exterior, roof, attic, HVAC, plumbing, electrical, interior finishes, and safety items — with labeled photos, location descriptions, and priority ratings on every finding. Optional add-ons include radon testing, mold testing, and sewer line inspection if your punch list or drainage findings warrant a closer look.
We recommend booking during month 10. Slots fill quickly, and you need the inspection completed, the report reviewed, and the claim submitted while the builder still has time to respond before your warranty expires. We are available on weekends and serve Lake, McHenry, DuPage, and northern Cook Counties.
Schedule your 11-month inspection now and protect the coverage you paid for.
Sources
- Warranties for New Homes | Consumer Advice
- The 11-Month Warranty Inspection: The Highest-ROI Inspection You Probably Haven’t Had – InspectandTest
- Do Builder Warranties Really Hold Up When It Counts? Depends on How You Use Them – NerdWallet
- Should You Get an 11-Month Warranty Inspection? Pros and Cons