TL;DR:
- A pre-closing inspection checklist verifies repairs, tests systems, and identifies damage that may have occurred since contract signing. Conducted within 24 to 48 hours of closing, it ensures the property is in the agreed condition before final transfer. Proper documentation, system testing, and thorough inspection help buyers avoid costly post-closing issues.
A pre-closing inspection checklist is the structured tool homebuyers and realtors use to verify a property’s condition and confirm repair compliance before the purchase closes. Known formally as the final walk-through, this step is not a new comprehensive assessment. Its sole purpose is to answer one question: what has changed since the contract was signed? For Chicago buyers, that question carries extra weight. Freeze-thaw cycles, aging bungalows on the Northwest Side, and two-flats with decades of deferred maintenance all create conditions where a lot can change between contract signing and closing day.
What does a pre-closing inspection checklist cover?
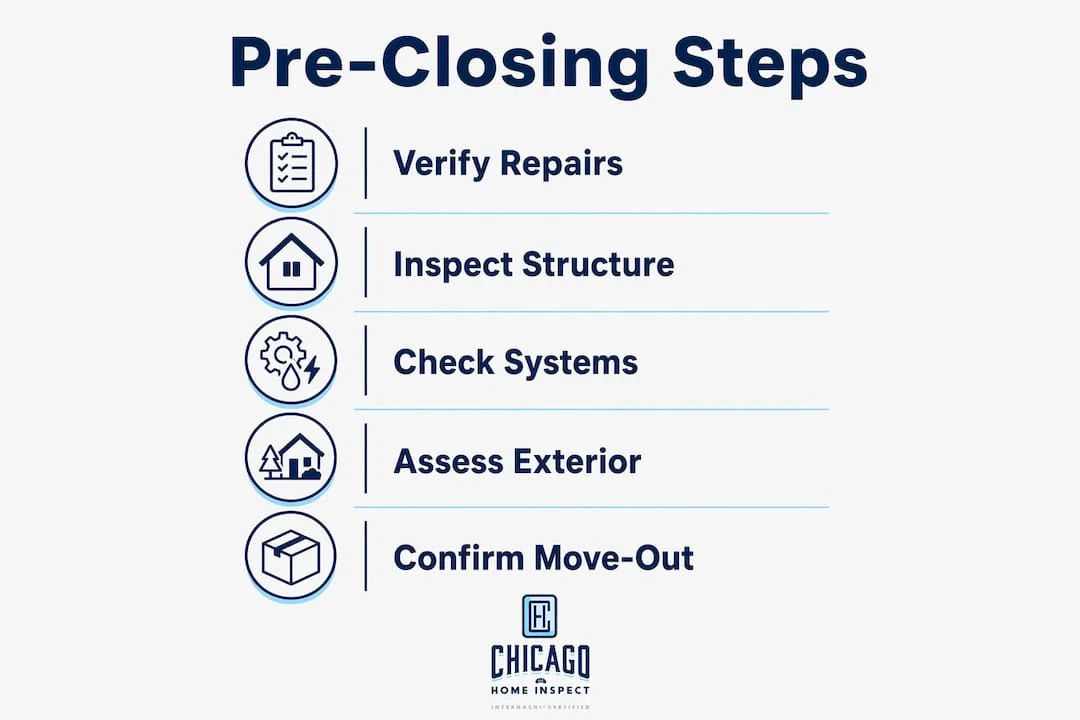
The final walk-through checklist covers three categories: repair verification, system functionality, and move-out damage. Each category serves a distinct purpose, and skipping any one of them creates real financial exposure after closing.
Repair verification confirms that every item listed in the signed repair addendum was completed. System functionality testing confirms that HVAC, plumbing, and electrical all operate as expected. Move-out damage inspection catches the fresh holes, floor scratches, and missing fixtures that appear when sellers remove furniture and appliances. Together, these three categories form the backbone of any reliable home walkthrough checklist.
Chicago’s housing stock adds a fourth layer. Graystones in Lincoln Park and frame homes in the suburbs often have older mechanical systems and original windows. A freeze event between contract signing and closing can crack a supply line or shift a foundation drain. That possibility makes the final home inspection checklist more than a formality here. It is a genuine last line of defense.
When should you schedule the final walk-through before closing?
The industry standard is to schedule within 24 to 48 hours of the closing date. That window balances two competing needs: the seller needs time to move out, and you need to see the home in its final, vacated state. Scheduling too early means you may miss damage caused during the move. Scheduling too late leaves no time to resolve problems before the closing table.
For Chicago closings, timing has a seasonal dimension. A walkthrough scheduled on a January morning after a hard freeze gives you a direct look at whether the heating system held up overnight. If the seller vacated two days earlier and turned the thermostat down, you want to know whether the pipes survived. That is not a hypothetical. We have seen it happen in older Logan Square two-flats where steam radiators were shut off prematurely.
Coordinate with your agent to confirm the seller’s move-out status before you arrive. If the seller is still present or movers are still on-site, reschedule. A home full of boxes and furniture prevents you from inspecting floors, walls, and the areas behind large appliances.
Pro Tip: Schedule the walkthrough for the evening before closing or the morning of closing day. That timing gives you maximum accuracy on the home’s final condition while still leaving enough time to contact your agent and attorney if something needs to be addressed.
What to bring to your final home walk-through
Arriving prepared separates a productive walkthrough from a wasted trip. Bring these documents and tools to every final home inspection checklist visit:
Documents:
- Original purchase agreement (confirms what fixtures and appliances are included)
- Home inspection report from the original inspection
- Signed repair addendum listing every agreed repair
- Repair receipts and invoices from licensed contractors
Tools:
- Flashlight for attic hatches, crawl spaces, and dark utility areas
- Phone charger to test electrical outlets
- Phone or camera for photo and video documentation
- Notebook to record observations room by room
The repair receipts deserve special attention. Copies of paid invoices and warranties from licensed contractors protect you at resale and preserve warranty rights. A seller who patched a leaking roof with an unlicensed handyman has not fulfilled the repair obligation in the same way a licensed roofing contractor has. That distinction matters in Illinois real estate disputes.
Your agent should have digital copies of all documents. Having them on your phone means you can cross-reference a repair item on the spot without waiting for an email.
Step-by-step pre-closing inspection checklist for Chicago homes
Work through this checklist room by room and system by system. Do not rush. A thorough real estate walk-through checklist takes 45 to 90 minutes depending on home size.
Verify agreed repairs first
Start with the repair addendum before you do anything else. Compare each line item against the receipts and invoices you brought. If a repair is listed but no receipt exists, flag it immediately. Do not assume the work was done.
Test every major system
- HVAC: Set the thermostat to heating mode and wait for the system to cycle on. Then switch to cooling mode and confirm the air handler responds. Testing HVAC under load reveals duct and zoning problems that a visual check misses entirely.
- Plumbing: Run every faucet in the kitchen and bathrooms. Check under sinks for leaks while the water runs. Flush every toilet. Test water pressure at the shower. In Chicago homes with older galvanized supply lines, low pressure at upper floors is a red flag.
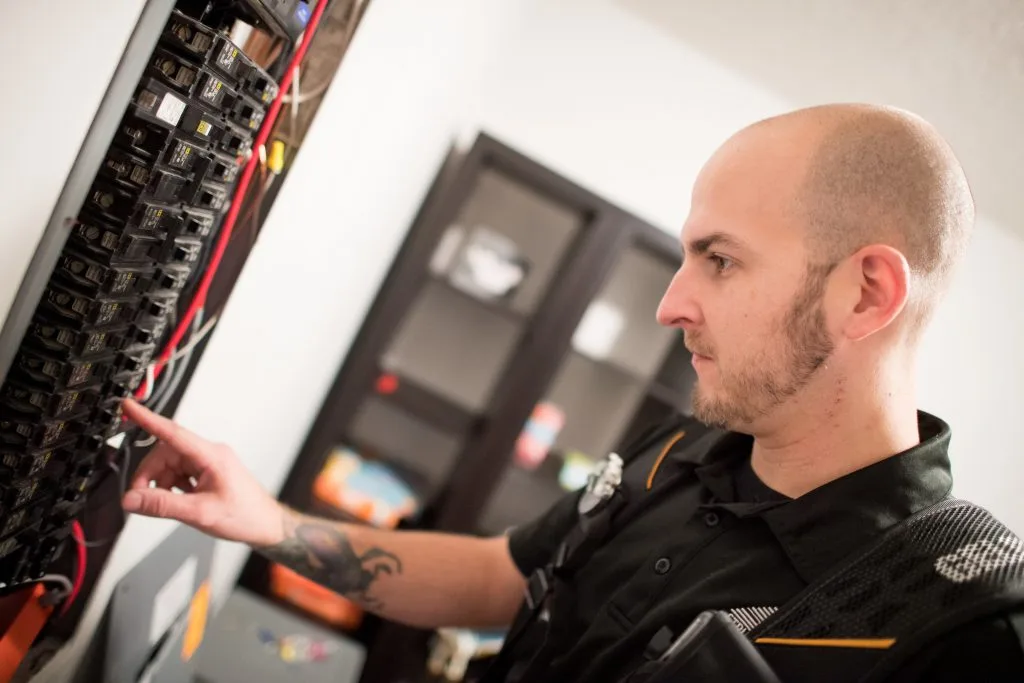
- Electrical: Plug your phone charger into every outlet you can reach. Flip every switch and confirm it controls the correct fixture. Test ceiling fans at all speeds. Check the panel for any new breakers that have tripped.
- Appliances: Run the dishwasher through a short cycle to confirm drainage. Test the range burners and oven. Check the refrigerator temperature if it is staying with the home.
- Water heater: Confirm the pilot is lit on gas units. Check the area around the base for moisture or rust staining.
Inspect structural elements and finishes
Walk every room and look at walls, ceilings, and floors. You are looking for new damage, not pre-existing conditions you already accepted. Note any fresh cracks, water stains, or paint that looks recently applied to cover something. Open and close every interior door. A door that suddenly sticks may indicate a structural shift or moisture intrusion since the original inspection.
Check all windows. Confirm they open, close, and lock. Broken seals on double-pane windows show as fogging between the glass. In Chicago’s Climate Zone 5, a failed window seal is a real energy and comfort issue through the winter months.
Check for move-out damage
The move-out process causes fresh damage more often than buyers expect. Focus on:
- Hallways and doorframes where furniture was carried out
- Hardwood floors at heavy furniture positions
- Walls near staircases
- Garage floors and driveways where moving trucks parked
Confirm that every fixture listed in the contract is still present. Light fixtures, bathroom mirrors, built-in shelving, and garage door openers are the items sellers most commonly remove by mistake or by intent.
Outdoor and exterior inspection
Walk the full perimeter. Check gutters for damage from ladders used during the move. Inspect the roof from the ground for any visible missing shingles. Look at the driveway and sidewalks for new cracks. In Chicago, a hard freeze between contract and closing can heave a concrete slab noticeably.
Pro Tip: Bring a moisture meter or ask your inspector to attend. Thermal imaging and moisture meters detect hidden water intrusion behind walls and under flooring that a visual walkthrough cannot catch, especially in older Chicago homes with basement moisture issues.
Common mistakes to avoid and how to handle problems
The most damaging mistakes buyers make during the final walk-through before closing fall into three categories.
Arriving without documents. Without the repair addendum and receipts, you cannot verify whether agreed repairs were completed. You are walking through blind.
Attempting to renegotiate. The final walkthrough confirms agreed repairs only. It is not a second negotiation session. Raising new cosmetic complaints at this stage creates delays and can jeopardize the closing. Focus strictly on contract compliance and new damage.
Skipping functional tests. A quick visual pass is not enough. Missing a kitchen sink leak can result in thousands of dollars in water damage after you take ownership. Run the systems. Test the outlets. Run the dishwasher.
If you find a genuine problem, follow this sequence:
- Photograph and video everything before touching it
- Contact your agent immediately, not after the closing
- Let your agent and attorney determine the remedy
Remedies for walkthrough findings include seller repair before closing, an escrow holdback for the repair amount, a closing credit, or a delayed closing. Your attorney decides which option fits the situation. Do not sign closing documents while a material issue is unresolved.
For Chicago buyers dealing with inspection repair negotiations, the escrow holdback is often the fastest path to closing on schedule while protecting your interests. Document everything with photos and written communication through your agent.
What we have learned inspecting Chicago homes before closing
We have conducted pre-closing inspections across Lake, McHenry, DuPage, and northern Cook Counties, and the pattern is consistent. Buyers who arrive prepared close with confidence. Buyers who treat the final walk-through as a formality sometimes inherit problems that cost real money.
The single most overlooked item on any new home final walk-through checklist is repair documentation. Sellers often complete the physical work but fail to provide receipts or contractor information. Without that paper trail, you cannot confirm the repair was done by a licensed professional, and you lose the warranty protection that comes with licensed work. We flag this every time.
Chicago’s older housing types create specific risks that buyers in newer suburban construction do not face. A graystone with original cast-iron drains, a bungalow with a knob-and-tube electrical panel, or a two-flat with a shared boiler all require more than a visual pass. These are systems where hidden issues surface under load, not under observation. Running the systems is not optional. It is the only way to know.
The buyers who call us after closing with a problem almost always say the same thing: “It looked fine during the walkthrough.” Looking fine and functioning correctly are two different standards. We hold to the second one.
— Chicago Home Inspect LLC
Get professional support for your pre-closing inspection
A checklist gives you structure. A trained inspector gives you certainty. At Chicago Home Inspect LLC, we are InterNACHI Certified, BBB Accredited, and available on weekends to fit your closing schedule. Our team inspects interiors, HVAC systems, plumbing, electrical, and exteriors with professional-grade tools that go beyond what any visual walkthrough can confirm. Browse our interior inspection photos and HVAC inspection photos to see exactly what we examine and document. We serve Lake, McHenry, DuPage, and northern Cook Counties. Schedule your inspection before your closing date and walk into that closing table knowing exactly what you are buying.
FAQ
What is a pre-closing inspection checklist?
A pre-closing inspection checklist is a structured list buyers and realtors use during the final walk-through to verify repair completion, test home systems, and check for new damage before closing. It focuses on changes since the contract was signed, not a full reassessment of the property.
How long before closing should the final walk-through happen?
The final walk-through should occur within 24 to 48 hours of the closing date. That window gives you an accurate view of the home’s final condition while leaving time to address any problems before you sign.
What documents should I bring to the final walk-through?
Bring the original purchase agreement, the home inspection report, the signed repair addendum, and all repair receipts and invoices. These documents let you verify on-site that every agreed repair was completed by a licensed contractor.
Can I renegotiate repairs during the final walk-through?
The final walk-through is not a renegotiation opportunity. It confirms that agreed repairs were completed and checks for new damage. Raising new cosmetic issues at this stage creates delays and is discouraged by real estate professionals.
What happens if I find a problem during the final walk-through?
Document the issue with photos and video, then notify your agent immediately. Possible remedies include seller repair before closing, an escrow holdback, a closing credit, or a delayed closing. Do not sign closing documents while a material issue remains unresolved.
Recommended
- End of Inspection Checklist: Essential Steps for Home Buyers | Chicago Home Inspect LLC
- Seller Inspection Checklist for Chicagoland Home Buyers | Chicago Home Inspect LLC
- Step by Step Home Inspection for Chicagoland Buyers | Chicago Home Inspect LLC
- Pre-Purchase Inspections with Home Inspectors in Chicago