A DIY mold test kit runs a low cost range. A a professional visual mold inspection typically costs a moderate amount. Full lab based sampling with a written plan and chain-of-custody documentation varies in price depending on the number of samples collected. But the decision rule matters more than any of those numbers: if you can see mold, the EPA says sampling is generally unnecessary because there’s no federal health-based threshold for indoor mold spore counts to test against anyway. Find the moisture, fix it, and clean the mold. Testing earns its cost in narrower situations, like confirming a remediation job actually worked or when a doctor needs data tied to a patient’s symptoms.
Here’s the quick price map most Chicago homeowners are looking for:
- DIY air or surface kits cost a low amount, plus an additional lab fee per sample if sent.
- Professional visual inspections cost a moderate amount for a typical home.
- Full professional testing with multiple samples is more expensive and depends on sample count and specialty analysis.
- Post-remediation clearance testing costs vary but generally less than original testing.
Pro Tip: If a company offers you “free mold testing,” ask what happens after. If the answer always ends in a remediation quote from the same company, that’s not a diagnostic service. That’s a sales funnel.
The Minnesota Department of Health puts it bluntly: mold testing is often not appropriate as a first response, and a careful visual inspection should come before anyone reaches for a swab or air pump. That single piece of guidance saves more homeowners money than any coupon code ever will.
Table of Contents
- What Is Mold and Why Does Moisture Control Matter More Than Testing?
- Mold Inspection vs. Mold Testing: What’s the Difference?
- When Do You Actually Need a Mold Inspection or Test?
- What Types of Mold Tests Are Available?
- How Much Does Mold Testing Actually Cost?
- What Drives the Price Up or Down?
- What Happens During a Mold Inspection and Sampling Visit?
- How Do You Read a Mold Lab Report, and What Are Its Limits?
- When Is Mold Testing Actually Worth the Money?
- How Do You Choose a Qualified Mold Inspector?
- What Should You Do After Getting Results?
- Our Approach to Mold Inspections in Chicago Homes
- Where This Guidance Comes From
- Get a Straight Answer on Your Chicago Home’s Mold Risk
- Frequently Asked Questions
- Sources
What Is Mold and Why Does Moisture Control Matter More Than Testing?
Mold is a fungus that reproduces through microscopic spores, and those spores are already present in outdoor and indoor air everywhere, all the time. The problem isn’t mold’s existence. It’s mold’s growth, which requires sustained moisture, a food source (drywall, wood, dust, and adhesive all qualify), and time, usually 24 to 48 hours of dampness before colonies take hold.
That’s why chasing a spore count with a lab test, before you’ve addressed the water source, tends to be a waste of money. You end up with a number that tells you mold is present, which you already knew, without telling you where the water is coming from or how to stop it.
In Chicago, moisture sources tend to follow predictable patterns tied to our building stock and climate:
- Freeze-thaw cycles crack foundation walls and mortar joints in older masonry, letting groundwater seep into basements every spring.
- Older plumbing and roof flashing in Northwest Side bungalows and Logan Square two-flats fail quietly behind walls for months before a stain appears.
- Graystones in Lincoln Park and other pre-1940 construction often have limestone or brick foundations with different drainage behavior than newer poured-concrete builds, which changes where water pools.
- Condensation on old windows and uninsulated pipes, a common issue in Climate Zone 5 homes during Chicago winters, feeds mold growth in places owners rarely check.
Fix the water. That’s the entire first move, regardless of what any lab report eventually says.
Mold Inspection vs. Mold Testing: What’s the Difference?
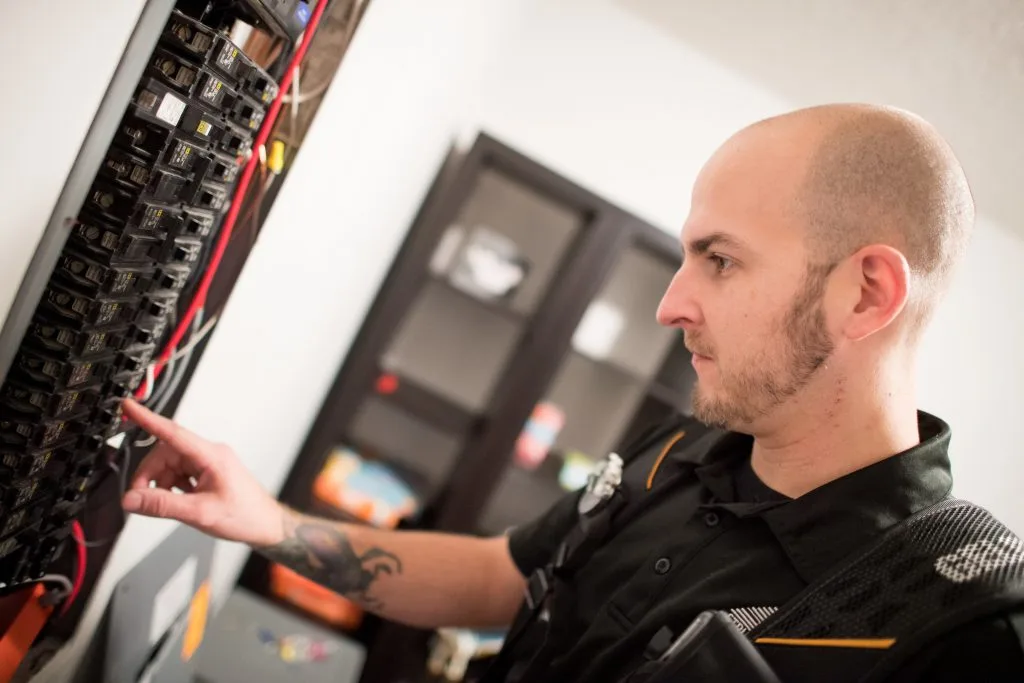
A mold inspection is a visual and moisture-focused investigation. A licensed inspector walks the property, checks for staining, uses a moisture meter on suspect walls and framing, sometimes runs a thermal camera to spot hidden dampness behind drywall, and logs humidity levels in problem areas like basements and crawlspaces. The output is a written report identifying where moisture is entering and where mold is likely to be growing, whether or not a single sample gets collected.
Mold testing, by contrast, means physically collecting air, surface, or bulk samples and sending them to a laboratory for species identification and spore counts. It answers a narrower question: what’s actually in this specific sample, from this specific spot, on this specific day. NIOSH’s Dampness and Mold Assessment Tool (DMAT) guidance recommends thorough visual inspection first and notes that short-term air samples may not reflect a home’s actual, ongoing exposure conditions.
An inspection alone is usually sufficient when mold is visible, the moisture source is identifiable, and no one in the home has ongoing, unexplained symptoms. Testing adds real value when the mold is suspected but hidden, when you need documentation for insurance or a real estate transaction, or when you’re verifying that a remediation job actually worked. Our guide comparing mold inspection and mold testing breaks down which service fits which scenario in more detail.
Pro Tip: Ask any firm quoting “free testing” one direct question: who analyzes the samples and are they independent of the company doing the remediation? If the answer is vague, walk away. An independent inspection with no financial stake in finding a problem is the whole point.
When Do You Actually Need a Mold Inspection or Test?
Most homeowners land in one of four situations. Knowing which one you’re in tells you whether to call for an inspection, request lab sampling, or simply grab a scrub brush and fix a leak.
Visible and physical signs that warrant a professional look:
- Mold covering more than roughly 10 square feet (about a 3×3 area), which the EPA generally treats as a job for a professional rather than a DIY cleanup.
- Recurring damp spots on ceilings or walls that return after cleaning.
- A persistent musty smell with no visible source.
- Recent flooding, a slow plumbing leak, or a sump pump failure.
Health-based triggers:
- Occupants still report symptoms, coughing, congestion, headaches, after the moisture problem has been fixed and visible mold cleaned.
- A physician requests indoor air data as part of diagnosing or treating a patient. Massachusetts DPH guidance specifically flags physician requests and lingering symptoms as reasonable triggers for testing, separate from routine remediation work.
- A diagnosed mold-related allergy or fungal sensitivity in a household member, since individual reactions to mold vary and testing alone can’t confirm mold is the cause of a specific person’s symptoms.
Real estate and legal triggers:
- A homebuyer wants documentation before closing on a property with a history of water intrusion.
- An insurance claim requires lab evidence of contamination extent.
- Litigation or a seller disclosure dispute needs defensible, chain-of-custody sample data.
If you smell mold but can’t see it, that’s a hidden-mold situation. Start with a visual and moisture inspection, including humidity readings behind likely problem walls, before jumping to sampling. Most hidden mold gets located this way, without a single lab fee.
Do I need mold testing if I can already see the mold? Generally, no. If mold is visible, the source is usually identifiable, and remediation guidance points toward cleaning and moisture correction, not sampling, as the next step.
Is mold testing required to sell a house in Chicago? No state or city law requires it, though a buyer’s financing or an insurer may request documentation in specific cases involving prior water damage claims.
What Types of Mold Tests Are Available?
Testing methods split into four broad categories, each answering a different question.
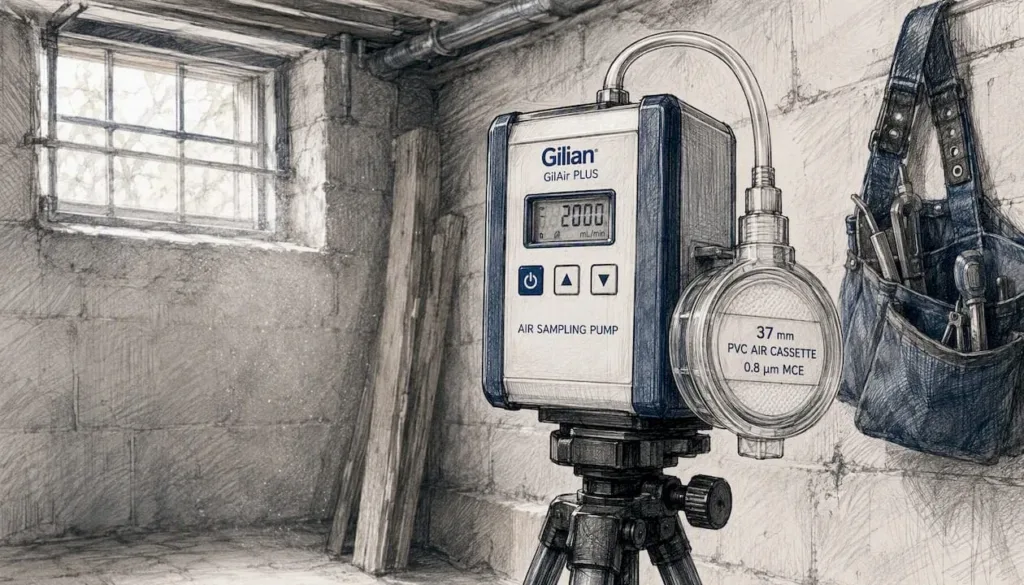
Air sampling pulls a measured volume of air through a cassette that captures spores, which a lab then counts and identifies by species. It’s the most common method for comparing indoor air to an outdoor control sample, and it’s useful when mold is suspected but not visible.
Surface sampling (tape lifts or swabs) identifies what species are growing on a specific visible surface. It’s cheap per sample and useful for confirming that a stain or discoloration is actually mold rather than dirt or mineral deposits.
Bulk sampling involves removing a physical piece of material, drywall, insulation, carpet, for lab analysis. It’s more invasive but gives a clear answer about contamination within that material.
ERMI (Environmental Relative Moldiness Index) is a DNA-based, quantitative test that analyzes dust samples for 36 mold species and produces a numeric score. It’s more expensive and typically reserved for research contexts, litigation, or cases where a standard visual and air-sampling approach hasn’t resolved the question.
DIY kits, the petri-dish or swab varieties sold at hardware stores, can tell you that mold spores are present in a room. They almost never tell you the species, the concentration relative to outdoor air, or where the moisture source is. Our breakdown of home mold testing limits covers why DIY results are so easy to misread. A professional sample only becomes meaningful when it’s collected with a documented plan, labeled correctly, and analyzed by an AIHA-accredited laboratory with proper chain-of-custody paperwork. Without that chain of custody, a lab report has little defensive value in an insurance claim or real estate dispute.
How Much Does Mold Testing Actually Cost?
Prices vary by home size, sample count, and whether you’re paying for a DIY kit or a full professional plan. Here’s what typical costs look like across the range:
| Service | Cost | What’s Usually Included |
|---|---|---|
| DIY test kit | $10 to $50 | Kit only; lab fee often extra ($30 to $50/sample) |
| Our mold testing (add-on to a home inspection) | $249 | Sample collection, lab analysis and written results |
| Extensive sampling plan (5+ samples or ERMI) | Quoted by scope | Multiple sample types, specialty analysis, detailed report |
| Post-remediation clearance testing | Quoted by scope | Smaller sample set confirming cleanup success |
Two example scenarios show how this plays out in real Chicago homes. A condo owner in Lincoln Park with a single damp spot near a window might need only a visual inspection and never a lab sample at all, since the moisture source (a failed window seal) is obvious on sight. A two-flat owner in Logan Square dealing with a persistent basement odor and no visible growth might need a full inspection plus three to five air samples, with outdoor controls and a written sampling plan.
What’s often left off an initial quote: travel fees for outer suburbs, rush lab turnaround (can add $50 to $150), and the written report itself, which some cut-rate providers treat as an upsell rather than a standard deliverable. Always ask what’s included before booking.
What Drives the Price Up or Down?
Several factors push a quote higher or lower, and understanding them helps you compare bids that otherwise look wildly different for the same job.
- Number and type of samples. Each additional air or surface sample adds lab cost, typically $30 to $75 per sample depending on the analysis requested.
- Home size and story count. A three-story graystone with a finished basement takes longer to inspect than a one-story ranch in the suburbs.
- Access difficulty. Cramped crawlspaces, tight attic hatches, and finished basements with limited access all add labor time.
- Specialty assays. ERMI or PCR-based species identification costs more than standard culture or spore-count analysis.
- Rush turnaround. Standard lab processing runs three to five business days; 24 to 48 hour rush service costs extra.
- Travel distance. Properties in far northern Cook County or rural McHenry County may carry a small travel fee compared to closer-in suburbs.
Bundling an inspection with testing, rather than booking them separately, often lowers the per-sample cost because the provider is already on-site and has already mapped the moisture sources.
Pro Tip: A rock-bottom testing quote almost always means fewer samples, no outdoor control, or a lab with no accreditation. That’s not a discount. That’s a report you can’t actually use for insurance or a real estate dispute, which means you’ll likely pay for testing twice.
What Happens During a Mold Inspection and Sampling Visit?
A competent inspection follows a predictable sequence, and knowing it helps you evaluate whether the provider you hired actually did the job.
- Visual survey of the entire property, not just the room where you noticed a problem, including attic, basement, and crawlspace access points.
- Moisture meter readings on walls, framing, and flooring near any suspect area, logged with specific numbers rather than a vague “feels damp” note.
- Thermal imaging, when the inspector carries the equipment, to spot temperature differences that indicate moisture behind finished surfaces.
- Humidity logging in basements and other enclosed spaces, since relative humidity above roughly 60% supports ongoing mold growth even without a visible leak.
- Photo documentation of every suspect area, staining pattern, and moisture reading, which becomes part of your written report.
If sampling is part of the visit, a properly run sampling appointment includes a documented sampling plan explaining why each sample location was chosen, at least one outdoor control sample for comparison, correctly labeled sample containers, chain-of-custody paperwork tracking the sample from collection to lab receipt, and secure packaging for transport. Our sample inspection report shows the level of documentation a homeowner should expect to receive at the end of the process, and our inspection day guide covers what to expect from scheduling through final report delivery.
Before the inspector leaves, you should have photo evidence of every area of concern, a written sampling plan if samples were taken, and a clear timeline for lab results.
How Do You Read a Mold Lab Report, and What Are Its Limits?
A lab report gives you a spore count and species breakdown for one sample, collected at one moment, in one location. That’s a snapshot, not a diagnosis. A single air sample taken on a dry, low-humidity afternoon can look completely different from one taken the week before, after a week of rain drove basement humidity up.
The most useful interpretation compares indoor results to an outdoor control sample collected the same day. If indoor spore counts and species composition roughly match outdoor levels, that’s generally a good sign. If indoor counts are dramatically higher, or if a water-loving species like Stachybotrys shows up indoors and not outdoors, that points toward an active indoor moisture problem worth investigating further.
There is no EPA or federal standard establishing a “safe” or “unsafe” level of mold spores in indoor air. Regulatory guidance consistently states that visible mold should be remediated regardless of what a sample shows, because no numeric threshold exists to compare it against.
The EPA’s brief guide to mold and moisture reiterates that sampling requires experienced interpretation and that results without context, no outdoor control, no documented sampling rationale, are close to meaningless. A report showing “500 spores per cubic meter” tells you nothing on its own; it only becomes useful when compared against an outdoor baseline and paired with a visual inspection of where the sample was taken.
When Is Mold Testing Actually Worth the Money?
Testing earns its cost in a fairly short list of situations:
- Post-remediation clearance. After a remediation company finishes a job, sampling can confirm indoor spore levels have returned to something close to outdoor baseline, which the EPA identifies as one of testing’s most legitimate uses.
- Ongoing symptoms after the moisture is fixed. If occupants are still unwell weeks after visible mold was cleaned and the water source addressed, testing can help rule mold in or out as a lingering factor.
- A physician requests specific data to guide treatment for a patient with respiratory or allergy symptoms.
- The moisture source remains unclear after a genuinely thorough visual and moisture-meter investigation, not as a shortcut to skip that investigation.
- Insurance claims or litigation where documented, chain-of-custody sample data will carry more weight than a homeowner’s photos alone.
Timing matters in both directions. Materials that stay wet longer than 24 to 48 hours are at real risk of mold colonization, so speed on the drying side prevents the problem entirely. On the testing side, clearance sampling should happen only after cleanup and drying are fully complete, testing too early, while materials are still damp, produces results that don’t reflect the finished job.
The decision flow is simple: locate and stop the moisture first, clean visible mold, and test only when one of the five situations above actually applies to your case.
How Do You Choose a Qualified Mold Inspector?
Not every provider offering “mold testing” is equally qualified, and the industry has enough loose credentialing that a little vetting goes a long way.
Look for InterNACHI certification or state-specific mold licensure where your state requires it, proof of insurance, and, critically, independence from any remediation company. An inspector who profits from finding a problem has a built-in conflict of interest. If lab analysis is involved, confirm the lab holds AIHA accreditation, since that’s the industry benchmark for reliable, defensible results.
Before booking, ask these questions directly:
- Why are you recommending this number of samples, and what would change that number?
- Will you include an outdoor control sample?
- What’s your chain-of-custody process from collection to lab?
- Which lab does the analysis, and is it AIHA-accredited?
- What’s the turnaround time, and is rush processing available?
- Can you break down the cost per sample versus the inspection fee?
Red flags worth walking away from: free testing bundled with a remediation quote, a sampling plan that can’t be explained in plain language, no outdoor control sample, or an inspector who can’t point to a specific moisture source before proposing to test for mold. If they can’t explain where the water is coming from, more samples won’t fix that gap in the investigation.
What Should You Do After Getting Results?
Results in hand, the sequence from here is straightforward, whether or not sampling was part of the process:
- Fix the moisture source first, always, regardless of what a lab report says. A grading problem, a cracked foundation, or a failed roof flashing needs a contractor, not another test.
- Remove and clean affected materials. Porous materials like drywall and carpet padding with mold damage usually need replacement rather than cleaning.
- Hire a remediation company for medium to large jobs, generally anything beyond a small, contained area a homeowner can safely handle alone.
- Verify with post-remediation testing when it matters, particularly for real estate transactions, insurance documentation, or cases where occupant symptoms were the original trigger.
Remediation costs vary widely by scope. A small, contained cleanup might run a few hundred dollars in materials and labor if handled directly. Larger jobs involving multiple rooms, structural drying equipment, or mold inside HVAC ductwork can run into the thousands, particularly when structural repairs like drywall replacement or subfloor work are required. Costs escalate fastest when mold has spread into HVAC systems, since duct cleaning and sometimes full component replacement get added to the bill.
Plan for materials to dry within 24 to 48 hours whenever water intrusion happens, since that window is the difference between a quick wipe-down and a multi-week remediation project. For water-damage-specific restoration steps, including drying equipment and moisture monitoring during that critical window, DJ Custom Contracting’s guide to restoring water-damaged homes covers the mechanics in more depth. Clearance testing, if you’re doing it at all, only makes sense after drying and cleanup are fully finished, never mid-project.
Our Approach to Mold Inspections in Chicago Homes
We treat mold testing as a tool, not a default. Every inspection we run starts with a visual and moisture-focused investigation, moisture meter readings, humidity logging, and a careful look at the places Chicago homes tend to hide water damage, because that approach answers most homeowners’ questions without adding lab fees they don’t need.
Chicago’s housing stock makes this local knowledge matter. A century-old bungalow on the Northwest Side has different moisture pathways than a Logan Square two-flat with a raised foundation, and a Lincoln Park graystone with original masonry behaves differently than a newer frame home in the suburbs. Our winters compound all of it: freeze-thaw cycles stress foundations and mortar joints every year, and Climate Zone 5 humidity swings create condensation risk in older, less-insulated buildings that newer construction doesn’t face the same way.
When testing genuinely adds value, we build a documented sampling plan, include outdoor control samples, and maintain chain-of-custody records so results hold up for insurance claims, real estate transactions, or your own peace of mind. You can review our mold testing services for Chicago homes and see exactly what’s included before you book.
Where This Guidance Comes From
The recommendations throughout this article follow established public health guidance rather than industry sales talk. A few sources are worth bookmarking if you want to dig deeper on your own:
- The EPA’s mold sampling guidance lays out when testing is and is not necessary, straight from the federal agency that sets indoor air policy.
- NIOSH’s mold testing and remediation resources cover assessment tools like DMAT and the limits of short-term air sampling.
- State health department guidance, like Massachusetts DPH’s mold testing guidance and Minnesota’s testing guidance, gives practical, consumer-facing advice on when testing is warranted.
AIHA-accredited laboratories and documented chain-of-custody procedures matter because they’re what make a test result usable beyond your own curiosity, for an insurance adjuster, a real estate attorney, or a court, a report without that paper trail carries little weight.
Get a Straight Answer on Your Chicago Home’s Mold Risk
Reading price ranges online only gets you so far when the mold, or the moisture behind it, is sitting in your own basement or attic. Chicago Home Inspect LLC is licensed, insured, InterNACHI certified, and BBB accredited, and we run mold inspections independent of any remediation company, so our findings aren’t shaped by an incentive to sell you a cleanup job. We serve Lake, McHenry, DuPage, and northern Cook Counties, and we’re available on weekends for homeowners and buyers who can’t take a weekday off work. Whether you need a straightforward visual inspection on a suspicious basement stain or a full sampling plan tied to a real estate closing, we’ll tell you honestly which one your situation actually calls for. Schedule a mold inspection with us and get a written report you can actually use.
Frequently Asked Questions
How much does mold testing cost on average?
DIY kits run $10 to $50. Our mold testing is $249 as an add-on to a home inspection, with lab fees included. Larger sampling plans are quoted by scope.
Do I need mold testing before buying a house?
Not automatically. If a pre-purchase inspection finds visible mold or a clear moisture problem, that’s usually enough to negotiate repairs. Testing adds value mainly when mold is suspected but not visible, or when you need documentation for a lender or insurer.
Can I just use a DIY mold test kit instead of hiring a professional?
DIY kits can confirm spores are present, but they rarely identify species accurately, never include an outdoor control for comparison, and won’t identify the moisture source. For anything beyond casual curiosity, a professional inspection delivers more usable information.
How long does it take to get mold test results back?
Standard lab turnaround runs three to five business days. Rush processing, when available, can return results in 24 to 48 hours for an added fee.
Is mold testing covered by homeowners insurance?
Coverage varies by policy and by the cause of the moisture. Sudden, accidental water damage is more commonly covered than long-term leaks or humidity issues, so check your specific policy language and talk to your insurer before assuming testing costs will be reimbursed.
This article is general information, not a substitute for advice from a qualified doctor. Consult a qualified healthcare professional about your own circumstances before acting on anything here.
Sources
- Is Sampling/Testing for Mold Necessary? | US EPA
- NIOSH: Testing and remediation for mold
- Mass
- Testing For Mold – MN Dept. of Health