

Seeing cracks in your vintage brick home doesn’t always mean disaster is looming. Many Chicago homeowners panic at the first sign of masonry damage, but pre-1950 brick homes have unique characteristics that require specialized inspection knowledge. Understanding what to look for and when to worry can save you thousands in unnecessary repairs while protecting your historic investment.
Table of Contents
- Introduction To Vintage Chicago Brick Homes
- Common Structural Challenges In Pre-1950 Brick Homes
- Moisture Management Challenges In Vintage Brick Homes
- Inspection Techniques For Mortar, Bricks, And Structural Integrity
- Maintenance And Preservation Tips Specific To Older Brick Homes
- Common Misconceptions Homeowners Have About Brick Inspections
- Summary And Next Steps For Homeowners
- Professional Inspection Services For Vintage Chicago Homes
- What Tools Can I Use At Home To Inspect My Vintage Brick Walls?
- When Should I Call A Professional For My Brick Home Inspection?
- Can Modern Mortar Be Used For Repointing Vintage Brick Homes?
- How Often Should I Inspect My Pre-1950 Brick Home?
Key takeaways
| Point | Details |
|---|---|
| Historic materials are vulnerable | Pre-1950 bricks and lime mortar are porous and susceptible to Chicago’s freeze-thaw cycles and moisture damage. |
| Not all cracks are dangerous | Thermal expansion and minor settling commonly cause harmless cracks, while large or spreading cracks need professional evaluation. |
| Specialized inspection needed | Vintage homes require moisture meters, visual documentation, and mortar assessment to detect issues early. |
| Use compatible materials | Repointing must use lime mortar, not modern cement, to maintain breathability and prevent brick damage. |
| Professional help matters | Regular expert inspections catch problems early and guide proper restoration for long-term preservation. |
Introduction to vintage Chicago brick homes
Pre-1950 Chicago brick homes typically used brick and lime mortar unique to their era. These materials differ dramatically from modern construction. Historic bricks were fired at lower temperatures, creating more porous surfaces that absorb moisture readily. Lime mortar, softer than today’s Portland cement versions, allowed walls to breathe and flex with seasonal movement.
This breathability was intentional. Builders knew Chicago weather’s impact on homes required materials that could handle extreme temperature swings. Winter freezes and summer heat cause expansion and contraction cycles that rigid modern materials can’t accommodate without cracking.
Chicago’s industrial past left another mark on vintage masonry. Decades of pollution exposure weakened exterior brick surfaces, creating a protective patina that paradoxically helps and harms preservation efforts. Understanding these historic mortar types helps you recognize normal aging versus actual deterioration.
Your home’s age means it survived nearly a century of Chicago’s harsh climate. That resilience came from smart material choices and construction techniques. Modern inspection approaches must respect these vintage characteristics rather than applying contemporary standards that don’t fit.
Common structural challenges in pre-1950 brick homes
Thermal expansion and foundation settlement commonly cause cracks in vintage brick walls. Chicago’s clay-rich soil shifts with moisture levels, creating minor foundation movement that translates into visible masonry cracks. Most of these cracks are cosmetic, not structural.
Vertical cracks often result from seasonal temperature changes. Bricks expand in summer heat and contract in winter cold. Lime mortar accommodates this movement better than modern cement, but joints can still develop hairline separations. Stair-step cracks following mortar joints typically indicate settling rather than catastrophic failure.
Recognizing serious versus benign cracks requires careful observation. Measure crack width with a ruler. Hairline cracks under 1/8 inch rarely signal danger. Cracks exceeding 1/4 inch, especially if widening over time, deserve professional attention. Document crack locations with photos and dates to track progression.
Common crack patterns to monitor:
- Vertical cracks at window corners from thermal stress
- Horizontal cracks near foundation from soil pressure
- Stair-step cracks along mortar joints from settling
- Diagonal cracks radiating from openings suggesting structural shift
Foundation cracks in Chicago homes behave differently than wall cracks. Foundation issues often show up first in basement walls before appearing in exterior masonry. Check both locations during inspections.
Seasonal crack behavior provides valuable clues. Cracks that open in winter and close in summer follow normal thermal patterns. Cracks that grow steadily regardless of season indicate ongoing structural problems. Keep a simple log noting crack behavior across different weather conditions.
Weather impact on brick structures extends beyond temperature. Wind-driven rain penetrates porous brick faces, while freeze-thaw cycles amplify minor weaknesses into major damage. Understanding these forces helps you prioritize inspection focus areas.
Moisture management challenges in vintage brick homes
Moisture intrusion is the leading cause of brick deterioration in Chicago vintage homes due to porous materials. Historic bricks can absorb up to 20% of their weight in water. When temperatures drop below freezing, trapped moisture expands, creating internal pressure that breaks brick surfaces.
Spalling is the most visible moisture damage. Brick faces flake off in layers, leaving rough, pitted surfaces. Once spalling starts, it accelerates because damaged areas absorb even more water. Early detection prevents this cascade of deterioration.
“Moisture exposure increases brick spalling risk by up to 40% in humid climates like Chicago.”
Efflorescence appears as white, powdery deposits on brick surfaces. Water dissolving salts inside bricks carries them to the surface where they crystallize. While efflorescence itself is harmless, it signals active moisture movement through your masonry.
Key moisture damage indicators:
- White salt deposits (efflorescence) on exterior walls
- Flaking or peeling brick surfaces (spalling)
- Crumbling mortar joints that powder when touched
- Dark staining patterns indicating water pathways
- Musty odors near interior walls
Moisture meters detect hidden problems before visible damage appears. These handheld devices measure moisture content inside walls without drilling holes. Readings above 15% indicate excessive dampness requiring investigation.
Infrared imaging takes detection further. Thermal cameras reveal temperature differences caused by wet masonry. Cold spots on exterior walls often mark moisture intrusion points. While homeowners can buy basic moisture meters, professional thermal imaging provides more comprehensive assessment.
Signs of moisture intrusion include interior wall discoloration and paint bubbling. Check basement walls carefully since groundwater pressure drives moisture upward through foundation bricks. Installing proper drainage and maintaining gutters prevents many moisture problems.
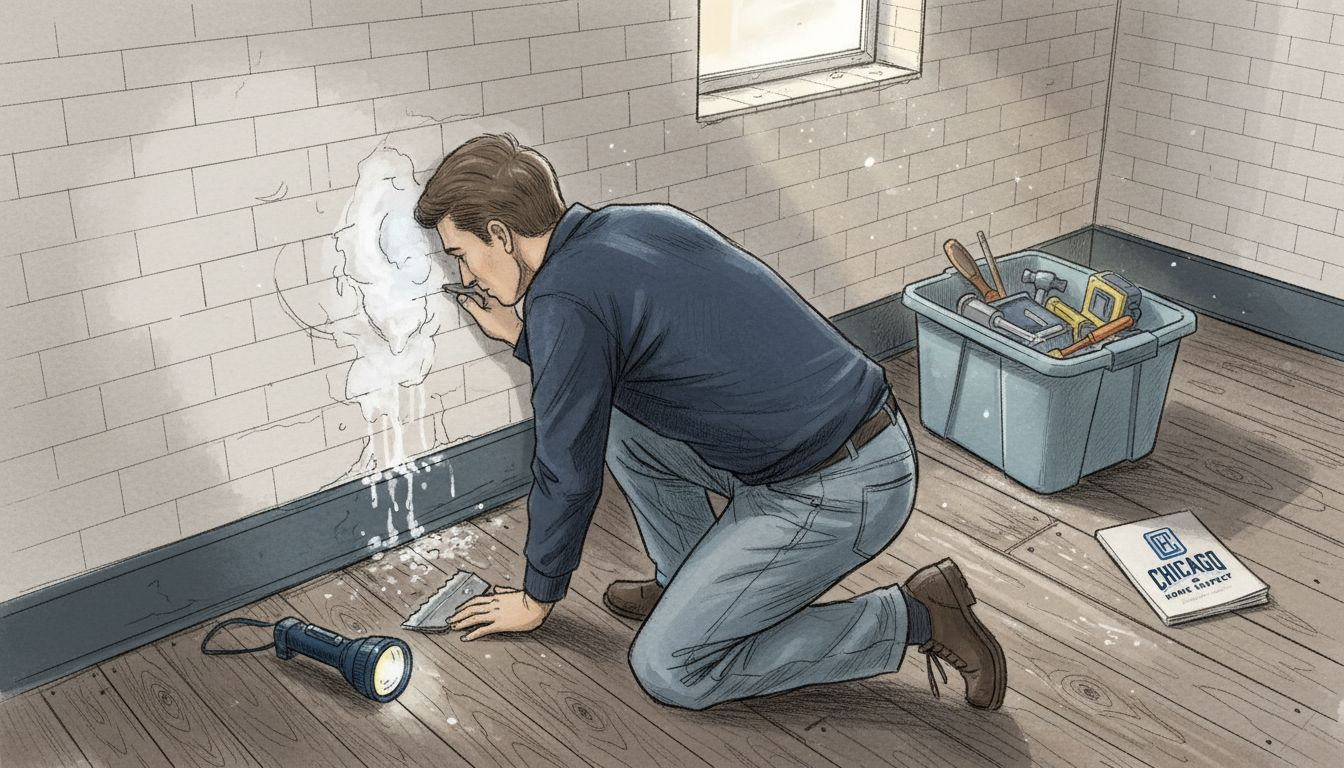
Preventing water intrusion starts with identifying entry points. Failed mortar joints, cracked bricks, and missing chimney caps all invite water penetration. Regular inspection lets you catch and fix small problems before they cause extensive damage.
Inspection techniques for mortar, bricks, and structural integrity
Systematic inspection reveals problems while they’re still manageable. Follow these steps for thorough assessment:
- Conduct detailed visual walkaround noting every crack, gap, and damaged area. Use binoculars to examine upper stories safely from ground level. Photograph everything for future comparison.
- Deploy moisture detection tools at suspect areas. Run a moisture meter across walls in a grid pattern, marking readings on a sketch. Focus on areas below roof lines, around windows, and near grade level.
- Measure mortar joint erosion with a ruler or depth gauge. Erosion exceeding one inch indicates urgent repointing needs to prevent water infiltration and brick loosening.
- Test brick soundness with gentle tapping using a wooden dowel. Solid bricks produce clear, sharp sounds while deteriorated ones sound dull or hollow. Never use metal hammers that can chip surfaces.
| Property | Lime Mortar | Portland Cement |
|---|---|---|
| Hardness | Softer, flexible | Hard, rigid |
| Permeability | Breathable, moisture escapes | Impermeable, traps moisture |
| Compatibility | Matches vintage brick strength | Too strong, damages softer bricks |
| Movement | Accommodates thermal expansion | Resists movement, cracks |
| Lifespan | 50-100 years typical | Longer but damages surrounding masonry |
Pro Tip: Create a simple inspection map marking crack locations, moisture readings, and deteriorated mortar sections. Update this map seasonally to track changes over time. Pattern recognition helps distinguish normal settling from progressive structural issues.
Overlooked inspection defects often hide in plain sight. Check chimney caps, window lintels, and brick soldier courses above openings where stress concentrates. These areas fail first but escape casual observation.
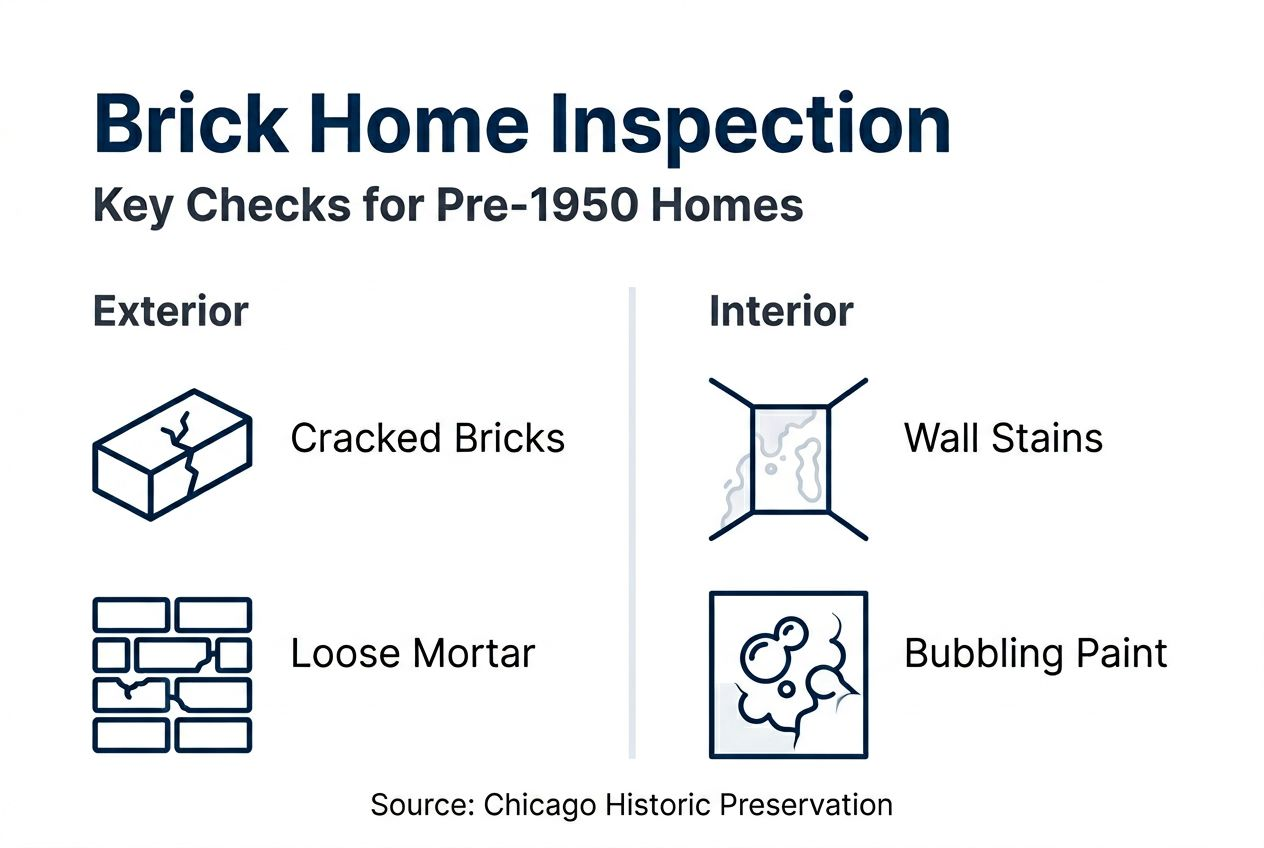
Documentation matters as much as detection. Date-stamped photos provide irrefutable evidence of condition changes. Many insurance claims and warranty disputes hinge on proving when damage occurred. Your inspection records become valuable property history.
Inspection issues examples from Chicago homes show recurring patterns. Understanding common failure modes helps you spot early warning signs specific to your neighborhood’s construction era and methods.
Maintenance and preservation tips specific to older brick homes
Gentle cleaning preserves vintage brick surfaces. High-pressure washing or harsh chemicals cause irreversible damage to porous historic bricks. Water pressure above 500 PSI can erode softer brick faces and blast out weakened mortar.
Safe maintenance practices:
- Use garden hose pressure or spray bottles for cleaning
- Scrub gently with natural bristle brushes, never wire
- Choose pH-neutral cleaners designed for historic masonry
- Test cleaning methods on inconspicuous areas first
- Rinse thoroughly to remove all cleaning residue
Repointing with compatible lime mortar maintains masonry health. Modern cement mortars are harder than vintage bricks, concentrating stress on brick faces rather than joints. This mismatch causes edge spalling and accelerated brick deterioration.
Schedule professional restoration when mortar erosion exceeds one inch depth or when bricks show extensive flaking. DIY repointing often does more harm than good without proper material knowledge and technique. Cleaning historic brick requires understanding your specific brick type and firing method.
Regular gutter maintenance prevents most moisture problems. Overflowing gutters dump water directly onto walls, saturating bricks and mortar. Check downspouts discharge at least six feet from foundations. Grade soil away from walls to prevent water pooling.
Pro Tip: Consult preservation experts before attempting any masonry repairs. Local historic preservation organizations often provide free or low-cost consultations. They can recommend qualified contractors experienced with vintage materials and techniques.
Chicago bungalow inspection tips apply equally to other vintage styles. These homes share similar construction methods and materials, making inspection approaches broadly applicable across pre-1950 Chicago housing stock.
Annual inspections catch small problems before they become expensive disasters. Spring inspections after freeze-thaw cycles and fall checks before winter reveal seasonal damage patterns. Overlooked home defects accumulate slowly, making regular monitoring essential.
Historic home restoration guide resources provide detailed preservation approaches. Following proven methods maintains your home’s value and historic character while ensuring structural soundness.
Common misconceptions homeowners have about brick inspections
Myth: All brick cracks signal serious structural damage. Reality: Many cracks are non-structural and related to thermal expansion or settling. About half of visible cracks in vintage brick walls are harmless, resulting from normal building movement.
Myth: Modern cement mortar is better for repairs. Reality: Portland cement mortar can harm vintage bricks by trapping moisture and creating hardness mismatches. The “better” modern material actually accelerates deterioration in historic masonry. Lime mortar’s softer composition protects bricks by sacrificing itself first.
Myth: Intact brick appearance means no moisture damage. Reality: Moisture damage often develops inside bricks and mortar long before surface signs appear. By the time spalling becomes visible, internal deterioration is already advanced. Early detection requires moisture meters and thermal imaging.
Additional common misunderstandings:
- Repointing is purely cosmetic (actually prevents water intrusion and structural failure)
- Any mason can work on historic brick (specialized training needed for proper material selection)
- Paint protects old brick (often traps moisture and accelerates damage)
- Tuckpointing and repointing are identical (tuckpointing is decorative, repointing is structural repair)
Inspecting century homes requires abandoning assumptions based on modern construction. What seems like failure in new buildings may be normal behavior in vintage masonry. Understanding these differences prevents unnecessary panic and inappropriate repairs.
Proper knowledge distinguishes serious from minor issues. Homeowners who understand their brick home’s unique characteristics make better maintenance decisions. They avoid wasting money on unnecessary repairs while catching real problems early.
Common Chicago inspection issues reflect the city’s housing stock age and climate. Recognizing patterns specific to your neighborhood and construction era improves inspection accuracy.
Summary and next steps for homeowners
Regular inspection using recommended methods protects your vintage brick investment. Visual checks, moisture monitoring, and mortar assessment catch problems early when repairs remain simple and affordable.
Essential action items:
- Inspect visible masonry quarterly, photographing any changes
- Monitor identified cracks for width increases or new propagation
- Use moisture meters to check suspect areas after heavy rain
- Schedule professional evaluation if deterioration accelerates
- Maintain gutters and drainage to prevent water-related damage
Consult professionals when large cracks appear, mortar erosion deepens beyond one inch, or moisture signs emerge inside walls. Many harmless cracks need monitoring rather than immediate repair, but expert evaluation provides peace of mind and proper guidance.
Using compatible materials for maintenance preserves masonry health. Lime mortar repointing, gentle cleaning methods, and breathable sealants maintain the balance vintage materials need. Modern shortcuts often create new problems while appearing to fix old ones.
Schedule professional inspections every three to five years or after significant weather events. Severe storms, extended freeze periods, and unusual precipitation patterns can accelerate deterioration. Foundation issue evaluation should accompany masonry inspections since problems often connect.
Early detection prevents costly repairs and preserves historic character. A $500 repointing job today prevents a $15,000 brick replacement project tomorrow. Your vintage home’s longevity depends on vigilant, informed stewardship.
Signs of moisture problems warrant immediate investigation regardless of your regular inspection schedule. Water damage progresses quickly, making prompt response critical.
Professional inspection services for vintage Chicago homes
Chicago Home Inspect LLC offers expert inspections focused on vintage brick home needs. Their inspectors understand pre-1950 construction methods and materials, providing specialized knowledge that general home inspections miss. Moisture and structural assessments tailored to historic masonry identify issues other inspectors overlook.
Detailed exterior home inspection photos and interior home inspection photos document current conditions thoroughly. These visual records help you understand identified issues and plan maintenance priorities. Comprehensive reports explain problems in plain language, connecting findings to practical repair recommendations.
Scheduling a professional inspection protects your historic home investment with expert guidance. InterNACHI certified inspectors bring current knowledge of preservation best practices and Chicago-specific masonry challenges. Weekend availability accommodates busy homeowner schedules.
Schedule your inspection to get personalized assessment of your vintage brick home’s condition. Early professional evaluation establishes baseline condition documentation and identifies immediate concerns requiring attention.
What tools can I use at home to inspect my vintage brick walls?
Homeowners can use a flashlight for close visual inspections, revealing crack details and mortar condition that escape casual observation. A basic moisture meter (available for $30-$50) detects damp spots behind walls before visible damage appears. Standard cameras or smartphones document issues with date stamps for tracking changes.
Infrared imaging is best done by professionals for hidden moisture since thermal cameras cost thousands and require interpretation training. Moisture intrusion signs often show up to basic tools before expensive detection equipment becomes necessary.
When should I call a professional for my brick home inspection?
Call a professional if cracks widen rapidly, mortar erosion exceeds one inch, or moisture signs appear inside walls. If you’re unsure about damage severity, expert evaluation provides clarity and prevents costly mistakes from inappropriate DIY repairs.
Scheduled periodic professional inspections every three to five years help prevent major issues through early detection. After severe storms or unusual weather events, professional assessment identifies new damage requiring prompt attention. Foundation issue evaluation often requires professional judgment to distinguish settling from structural failure.
Can modern mortar be used for repointing vintage brick homes?
For vintage brick homes, lime-based mortar is preferred because it is softer and breathable, preventing brick and mortar damage. Modern Portland cement mortar is too hard and impermeable for vintage bricks, risking damage from trapped moisture and hardness mismatches.
Using cement mortar can cause cracking and moisture trapping in older masonry. The harder modern mortar concentrates stress on softer historic bricks, accelerating spalling and deterioration. Common home inspection issues often trace back to inappropriate repointing materials from previous repairs.
How often should I inspect my pre-1950 brick home?
Quarterly visual inspections catch seasonal changes and weather damage promptly. Spring checks after freeze-thaw cycles and fall inspections before winter reveal the most common damage patterns. After severe storms or extended temperature extremes, conduct additional spot checks of vulnerable areas.
Professional inspections every three to five years provide expert evaluation beyond homeowner capabilities. This schedule balances thorough assessment with reasonable costs while maintaining adequate monitoring frequency for early problem detection.
Recommended
- How Chicago Weather Damages Homes & What to Inspect
- Inspecting Century Homes in Chicago: What Buyers Should Know
- Most Overlooked Defects Found in Chicago Home Inspections
- Foundation Issues in Chicago Homes: When Is It Serious?
- Preventative Heating Maintenance Steps for Efficient Homes – Skan Plumbing & Heating