
Water heater maintenance might sound simple, especially since nearly 29 million American homes use tank-style water heaters every year. Yet most people skip key steps and end up facing surprise leaks or sky-high energy bills. What really stands out is that a well-maintained water heater can actually double its lifespan, saving you thousands over time.
Table of Contents
- Step 1: Gather Necessary Tools And Materials
- Step 2: Turn Off The Power And Water Supply
- Step 3: Drain The Water Heater Tank
- Step 4: Inspect And Clean Components
- Step 5: Refill And Restart The Water Heater
- Step 6: Check For Leaks And Verify Operation
Quick Summary
| Key Point | Explanation |
|---|---|
| 1. Gather essential tools first | Start with safety gear and basic hand tools to ensure a smooth maintenance process. |
| 2. Turn off all power and water supply | Confirm that electricity and water flow are completely stopped before beginning maintenance. |
| 3. Drain the water heater tank | Regularly drain your tank to remove sediment build-up, improving efficiency and longevity. |
| 4. Inspect key components carefully | Examine the sacrificial anode rod and other parts to prevent corrosion and identify early issues. |
| 5. Conduct a thorough leak check | After maintenance, inspect for leaks and verify operation to ensure safety and proper function. |
Step 1: Gather necessary tools and materials
Before diving into water heater maintenance, having the right tools and materials is crucial for a smooth and safe process. Your preparation will determine the efficiency and success of your maintenance work. For Chicago homeowners familiar with DIY projects, this first step sets the foundation for comprehensive water heater care.
For a standard water heater maintenance project, you will need several essential tools. Safety should always be your primary concern. Start by gathering protective gear including safety glasses, heavy-duty work gloves, and closed-toe shoes to prevent potential injuries. You will also require basic hand tools that most homeowners already have in their garage or toolkit.
Here are the critical tools for your water heater maintenance:
- Adjustable wrench
- Flathead and Phillips screwdrivers
- Garden hose
- Bucket (minimum 5-gallon capacity)
- Pipe wrench
- Voltage meter or electrical tester
Additional materials you might need include a flashlight, camera for documenting any issues, and potentially replacement parts like drain valves or sacrificial anode rods. Many Chicago area hardware stores like Home Depot or local supply shops in neighborhoods like Wicker Park and Lincoln Park carry these specialized tools.
Before beginning your maintenance, ensure your workspace is clean, well-lit, and has sufficient room to move around the water heater. If you have a gas water heater, confirm you know the location of the gas shutoff valve. For electric models, locate the circuit breaker to completely disconnect power during maintenance.
Remember that while gathering tools might seem like a preliminary step, it is fundamental to preventing interruptions and ensuring a safe, efficient water heater maintenance process. Taking time to collect and organize your materials will make the entire procedure smoother and more professional.
Below is a table summarizing the essential tools and materials needed for water heater maintenance, along with their primary purposes to help you gather everything efficiently before getting started.
| Tool/Material | Purpose |
|---|---|
| Adjustable wrench | Loosen and tighten nuts and fittings |
| Flathead screwdriver | Remove component covers and access panels |
| Phillips screwdriver | Remove screws on electrical or gas covers |
| Garden hose | Drain water from the tank |
| Bucket (5-gallon minimum) | Collect water or sediment during draining |
| Pipe wrench | Work on stuck or corroded connections |
| Voltage meter/electrical tester | Verify power is off to prevent shock |
| Safety glasses | Protect eyes from splashes and debris |
| Heavy-duty gloves | Protect hands from hot surfaces and chemicals |
| Flashlight | Inspect tank interior and hard-to-see spots |
| Replacement parts (optional) | Replace worn drain valve or anode rod |
Step 2: Turn off the power and water supply
After gathering your tools, the next critical step in water heater maintenance is safely disconnecting power and water supply. This preparation prevents potential electrical hazards and water damage during your maintenance process. Proper shutdown is non-negotiable for your safety and the integrity of your water heating system.
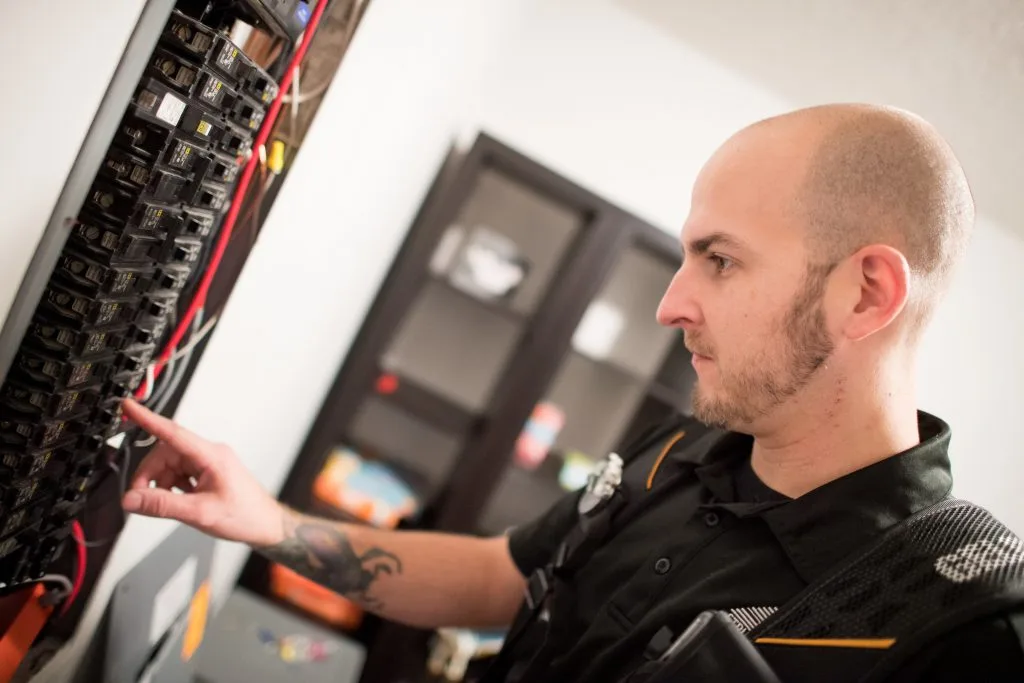
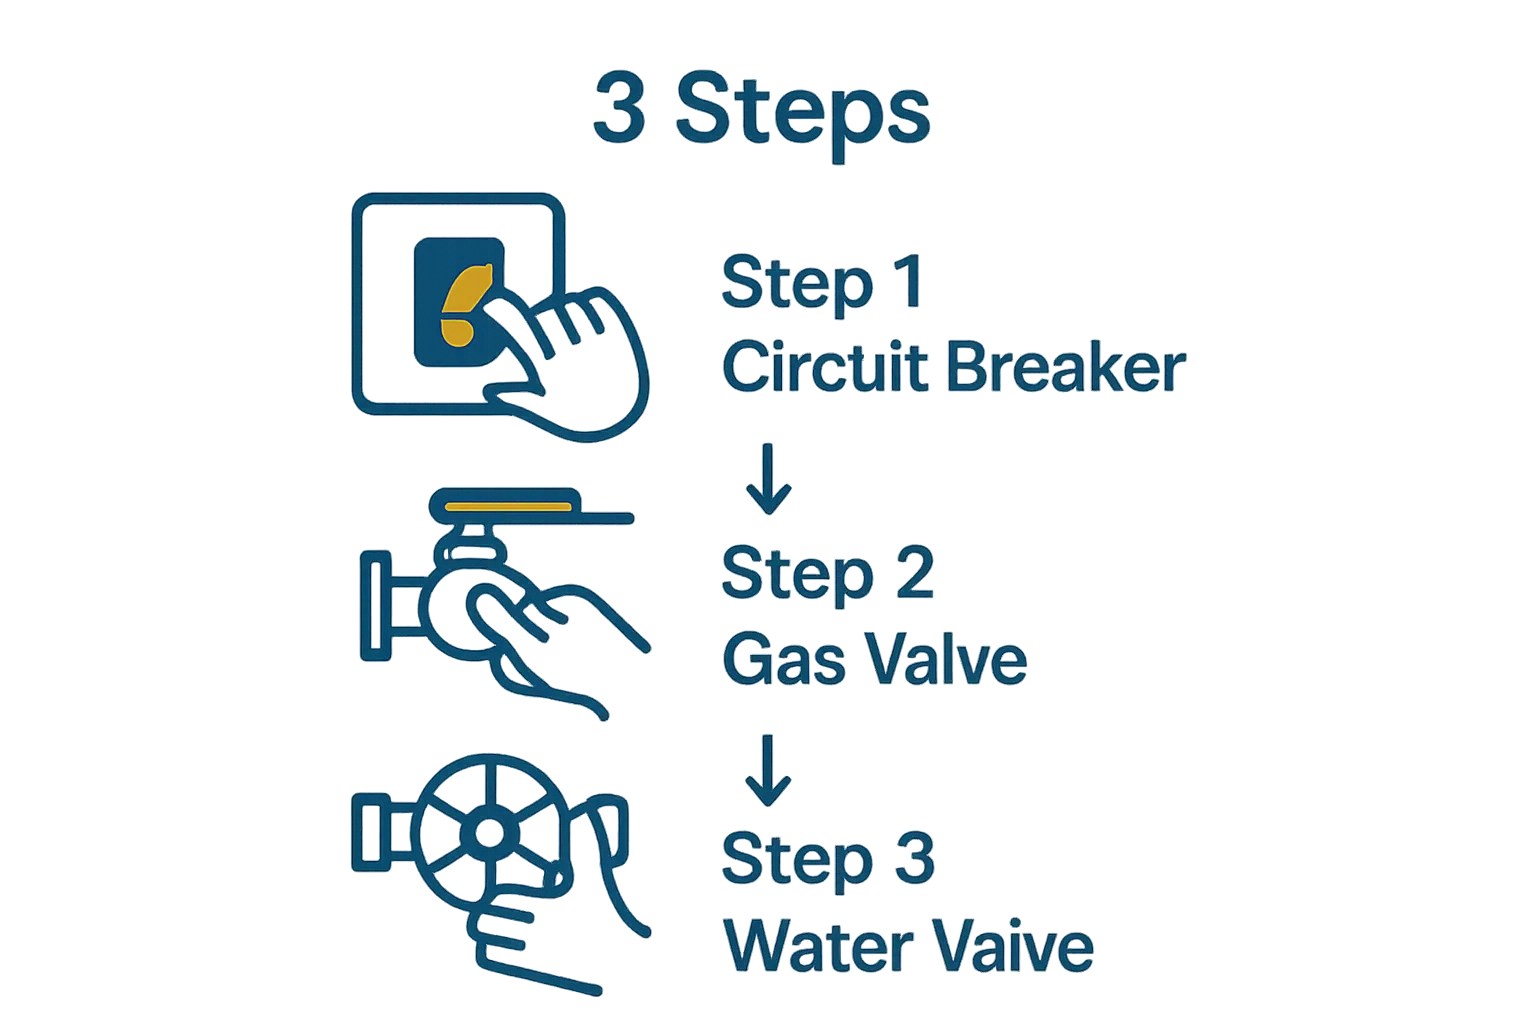
For electric water heaters, locate your home’s circuit breaker panel – typically found in basements or utility rooms in many Chicago area homes. Find the specific circuit breaker labeled for your water heater. According to Electrical Safety Foundation International, you should completely switch off the dedicated circuit breaker for the water heater, not just lower its power. Verify the power is off by testing nearby electrical outlets or using a voltage meter to confirm zero electrical current.
If you have a gas water heater, your shutdown process involves a slightly different approach. Locate the gas valve near the bottom of the water heater and turn it to the “off” position. This prevents gas flow during maintenance and eliminates potential safety risks. For those unfamiliar with gas systems, look for a red or yellow handle that can be perpendicular to the gas line when shut off.
For water supply shutdown, find the cold water inlet valve connected to your water heater. This valve is typically located at the top of the tank and can be turned clockwise to stop water flow. Pro tip for Chicago homeowners: if your valve appears stuck or corroded, avoid using excessive force. A light penetrating oil can help loosen stubborn valves without causing damage.
After shutting off power and water, allow the water in the tank to cool down for several hours. Hot water can cause severe burns, so patience is crucial. A good practice is to wait at least two to three hours before proceeding with further maintenance steps. This cooling period also allows sediment to settle, making subsequent draining processes more effective.
Before moving forward, double-check that both power and water are completely off. A simple test is attempting to turn on a hot water faucet – if no water flows, you have successfully completed this critical preparation step.
Step 3: Drain the water heater tank
Draining your water heater tank is a critical maintenance task that removes sediment and mineral buildup, which can significantly reduce your system’s efficiency. This process is particularly important in Chicago, where hard water can accelerate sediment accumulation in residential water systems.
Preparation is key before beginning the draining process. Connect a standard garden hose to the drain valve located at the bottom of your water heater tank. Ensure the other end of the hose leads to an appropriate drainage area, such as a floor drain, utility sink, or outdoor space that can handle hot water discharge. Consumer Reports recommends choosing a drainage location that can safely handle potentially scalding water.
Before opening the drain valve, you need to create a proper air flow system. Open a hot water faucet somewhere in your home – preferably on the same floor as the water heater. This step allows air to enter the system, enabling a smoother and more complete tank drainage. The open faucet prevents vacuum pressure from impeding water flow and helps the tank empty more efficiently.
Slowly open the drain valve, allowing water to flow through the connected garden hose. Watch the water’s color and clarity as it exits the tank. Initial drainage might appear cloudy or rusty, which indicates the presence of sediment and mineral deposits. Continue draining until the water runs clear, which typically takes 10-15 minutes depending on your tank’s size and accumulated sediment.
For Chicago homeowners with older water heater units, be prepared for potential complications. If the drain valve appears stuck or corroded, do not force it. Apply a light penetrating oil and allow it to sit for several minutes before attempting to turn the valve again. In cases of severe valve damage, it might be prudent to contact a professional plumber to prevent potential tank or valve damage.
Once the tank is completely drained, you can perform a quick visual inspection. Look for any signs of rust, corrosion, or unusual sediment buildup inside the tank. These observations can provide early warnings about potential future maintenance needs or indicate when a full water heater replacement might be necessary.
A successful drainage means clear water, no blockages, and a noticeably lighter tank weight.
Your water heater is now prepared for the next stages of comprehensive maintenance.
Step 4: Inspect and clean components
With the water heater tank drained, you can now perform a comprehensive inspection and cleaning of critical components. This step is crucial for identifying potential issues early and maintaining your system’s long-term performance. Chicago homeowners know that proactive maintenance can prevent costly repairs and extend equipment lifespan.
The sacrificial anode rod deserves special attention. This critical component prevents tank corrosion by attracting corrosive elements. National Association of Corrosion Engineers emphasizes the importance of regular anode rod inspection. Remove the rod using a socket wrench and examine its condition. Significant corrosion or excessive mineral buildup indicates it’s time for replacement. A rod covered more than 50% in calcium deposits or appearing significantly worn should be exchanged to protect your water heater.
Next, carefully inspect the tank’s interior walls and bottom for signs of rust, corrosion, or sediment accumulation. Use a strong flashlight to illuminate dark areas and look for any unusual discoloration or potential structural weaknesses. In older Chicago homes with aging water infrastructure, these visual inspections can reveal early warning signs of potential system failures.
For gas water heaters, pay close attention to the burner assembly and pilot light area. Clean the burner using a soft brush to remove dust and debris that might impede efficient operation. Check the pilot light opening for any blockages and ensure the flame burns a consistent blue color, which indicates proper combustion. Irregular flame colors like yellow or orange suggest potential ventilation or gas mixture problems that require professional evaluation.
Electric water heaters demand a different approach. Carefully examine electrical connections for any signs of corrosion or wear. Loose or corroded connections can significantly impact performance and pose safety risks. Use a clean cloth to wipe down electrical components, removing any dust or mineral buildup. If you notice any damaged wiring or suspect electrical issues, consult a licensed electrician.
The pressure relief valve is another critical component requiring careful inspection. Gently lift and release the valve to ensure it moves freely and does not show signs of sticking or corrosion. A properly functioning pressure relief valve prevents potential tank explosions by releasing excess pressure during operation.
A successful component inspection means identifying and addressing potential issues before they escalate into major problems. Take detailed notes or photographs of your findings to track your water heater’s condition over time and inform future maintenance decisions.
Step 5: Refill and restart the water heater
Refilling and restarting your water heater marks the final stage of your maintenance process, transforming all your careful work into a fully functional system. This step requires methodical attention to detail to prevent potential damage and ensure smooth operation. Patience and precision are your best tools during this critical phase.
Begin by slowly opening the cold water inlet valve, allowing water to flow back into the tank. Department of Energy recommends a gradual fill to prevent potential air pocket formation that could damage heating elements. Keep the hot water faucet you previously opened still running to help release any trapped air during the filling process. Watch the faucet closely – when water begins flowing steadily without sputtering, it indicates the tank is completely full.
For gas water heaters, the restart process involves carefully relighting the pilot light. Consult your specific model’s manual, as procedures can vary between manufacturers. Typically, you will turn the gas valve to the “pilot” position, press and hold the pilot button while using a long lighter to reignite the flame. Once the pilot light is stable, wait a few minutes before turning the valve to the full “on” position.
Electric water heaters require a more straightforward restart. Ensure all connections are secure, then return to your circuit breaker panel and switch the water heater circuit back to the “on” position. Listen for any unusual sounds during initial startup, which might indicate electrical or mechanical issues.
After restarting, monitor your water heater for the next few hours. Check for any signs of leakage around connections, valves, and the tank itself. The first hot water cycle might appear slightly discolored or contain small air bubbles, which is normal and should clear within a short time. Chicago homeowners should be particularly vigilant, as older home plumbing can sometimes introduce unexpected complications during system restarts.
A successful restart means consistent water temperature, no unusual noises, and no visible leaks.
The following table provides a concise overview of each main water heater maintenance step, including key actions and expected outcomes, to help you plan and track your process with confidence.
| Step | Key Actions | Expected Outcome |
|---|---|---|
| Gather Tools & Materials | Collect tools, safety gear, and workspace prep | Ready for safe, uninterrupted work |
| Turn Off Power & Water | Shut off circuit breaker/gas, close water inlet valve | Completely de-energized and depressurized system |
| Drain Water Heater Tank | Connect hose, open drain, clear sediment | Tank emptied, sediment removed |
| Inspect & Clean Components | Check anode rod, tank interior, pressure relief valve | Early detection of wear or corrosion |
| Refill & Restart Heater | Refill tank, restore power/gas, bleed air | System safely reheated for use |
| Check for Leaks & Verify | Inspect for moisture, test hot water temperature | Leak-free operation and reliable hot water |
Remember that water heater maintenance is not a one-time event. Mark your calendar for the next maintenance cycle and keep detailed records of each service to track your system’s long-term health and performance.
Step 6: Check for leaks and verify operation
The final stage of water heater maintenance involves a comprehensive leak inspection and operational verification. This critical step ensures your previous maintenance efforts have successfully restored your system’s functionality and prevents potential water damage in your home. Thoroughness is key when examining your water heating system.
Can’t Find Water Leak? Hidden Leak Detection Guide suggests carefully inspecting all connections, valves, and tank surfaces for signs of moisture or potential leakage. Begin by examining the area around the pressure relief valve, drain valve, and all pipe connections. Use a clean, dry paper towel to check for any moisture, which might indicate subtle leaks not immediately visible.
For gas water heaters, pay special attention to the gas line connections and the area surrounding the burner assembly. Any hint of gas odor or visible corrosion around connections could signal a potential safety hazard. According to National Fire Protection Association, even minor gas leaks can pose significant risks and should be addressed immediately by a professional.
Operational verification requires systematic testing. Start by checking water temperature at multiple fixtures throughout your home. Gradually turn on hot water faucets, observing water temperature, flow consistency, and listening for any unusual sounds from the water heater. Inconsistent temperatures or strange noises might indicate underlying mechanical issues that require further investigation.
Electric water heaters demand a slightly different approach. Observe the electrical connections for any signs of corrosion or unusual heat discoloration. Check that the reset button has not tripped and that the thermostat is functioning correctly. A properly operating electric water heater should provide steady, consistent hot water without fluctuations.
Document your findings during this inspection. Take photographs of any areas of concern and note specific observations about water temperature, pressure, and potential leak locations. These records can be invaluable for future maintenance or if you need to consult a professional plumber.
A successful leak and operation check means clean, dry connections, consistent water temperature, and no unusual sounds or odors. If you discover any persistent issues or feel uncertain about your findings, do not hesitate to contact a professional home inspector or plumbing specialist who can provide expert assessment.
Protect Your Water Heater—and Your Home—With Confidence
Are you concerned your DIY water heater maintenance might miss hidden problems? Detailed steps like draining the tank, checking for leaks, and inspecting the anode rod matter—but even careful homeowners may overlook early signs of corrosion, gas issues, or small leaks that threaten your home’s safety and property value. Keeping your water heater in top shape involves more than following a checklist. It means having peace of mind that every detail has been covered by a licensed expert who understands Chicago’s unique plumbing challenges.
Book a professional inspection now to catch issues before they become expensive emergencies. With Home Inspection Services, you get InterNACHI Certified, BBB Accredited pros who know how to spot what others miss during regular checkups, yearly maintenance, or pre-purchase walkthroughs. Ready to make sure your water heater and whole home stay safe year-round? Schedule your expert inspection today and take action before small problems become major repairs.
Frequently Asked Questions
What tools do I need for water heater maintenance?
You will need essential tools such as an adjustable wrench, screwdrivers, a garden hose, a bucket, a pipe wrench, and a voltage meter. Protective gear like safety glasses and gloves is also crucial for safety.
How do I safely turn off power and water supply to my water heater?
For electric water heaters, switch off the circuit breaker dedicated to the water heater. For gas models, turn the gas valve to the ‘off’ position. Lastly, close the cold water inlet valve to stop the water supply.
How often should I drain my water heater?
It is advisable to drain your water heater at least once a year to remove sediment and mineral buildup, which can affect efficiency and prolong the lifespan of your unit.
What should I check during my water heater inspection?
Inspect components such as the sacrificial anode rod for corrosion, the tank interior for rust and sediment, the burner assembly for cleanliness (in gas heaters), and the pressure relief valve for proper functioning.